ADVERTISEMENT
Instructions
1. Prep the Strawberries
Start by washing your strawberries thoroughly and patting them dry with a paper towel. To create the tree shape, it’s best to use larger strawberries, but smaller ones work just as well for a bite-sized treat.
- Tip: Leave the green stems on top of the strawberries to serve as the “top” of your Christmas tree.
Next, cut the bottom of each strawberry to create a flat surface. This will help the strawberry stand upright, forming the base of your tree. You’ll want them to have a slight triangular shape, like a tree, so don’t worry about making the cuts too precise—just trim them enough so they can stand on their own.
2. Melt the White Chocolate
In a microwave-safe bowl, add the white chocolate chips (or candy melts) and microwave them in 30-second intervals, stirring between each one until the chocolate is completely smooth. Be careful not to overheat the chocolate. You can also melt the chocolate using a double boiler if preferred.
Once the chocolate is melted, add a few drops of green food coloring to give the chocolate that festive, tree-like hue. Stir well to incorporate the color until you achieve the desired shade of green.
- Tip: If you want to make different colored trees, you can divide the melted chocolate into separate bowls and color them with different food coloring.
3. Dip the Strawberries
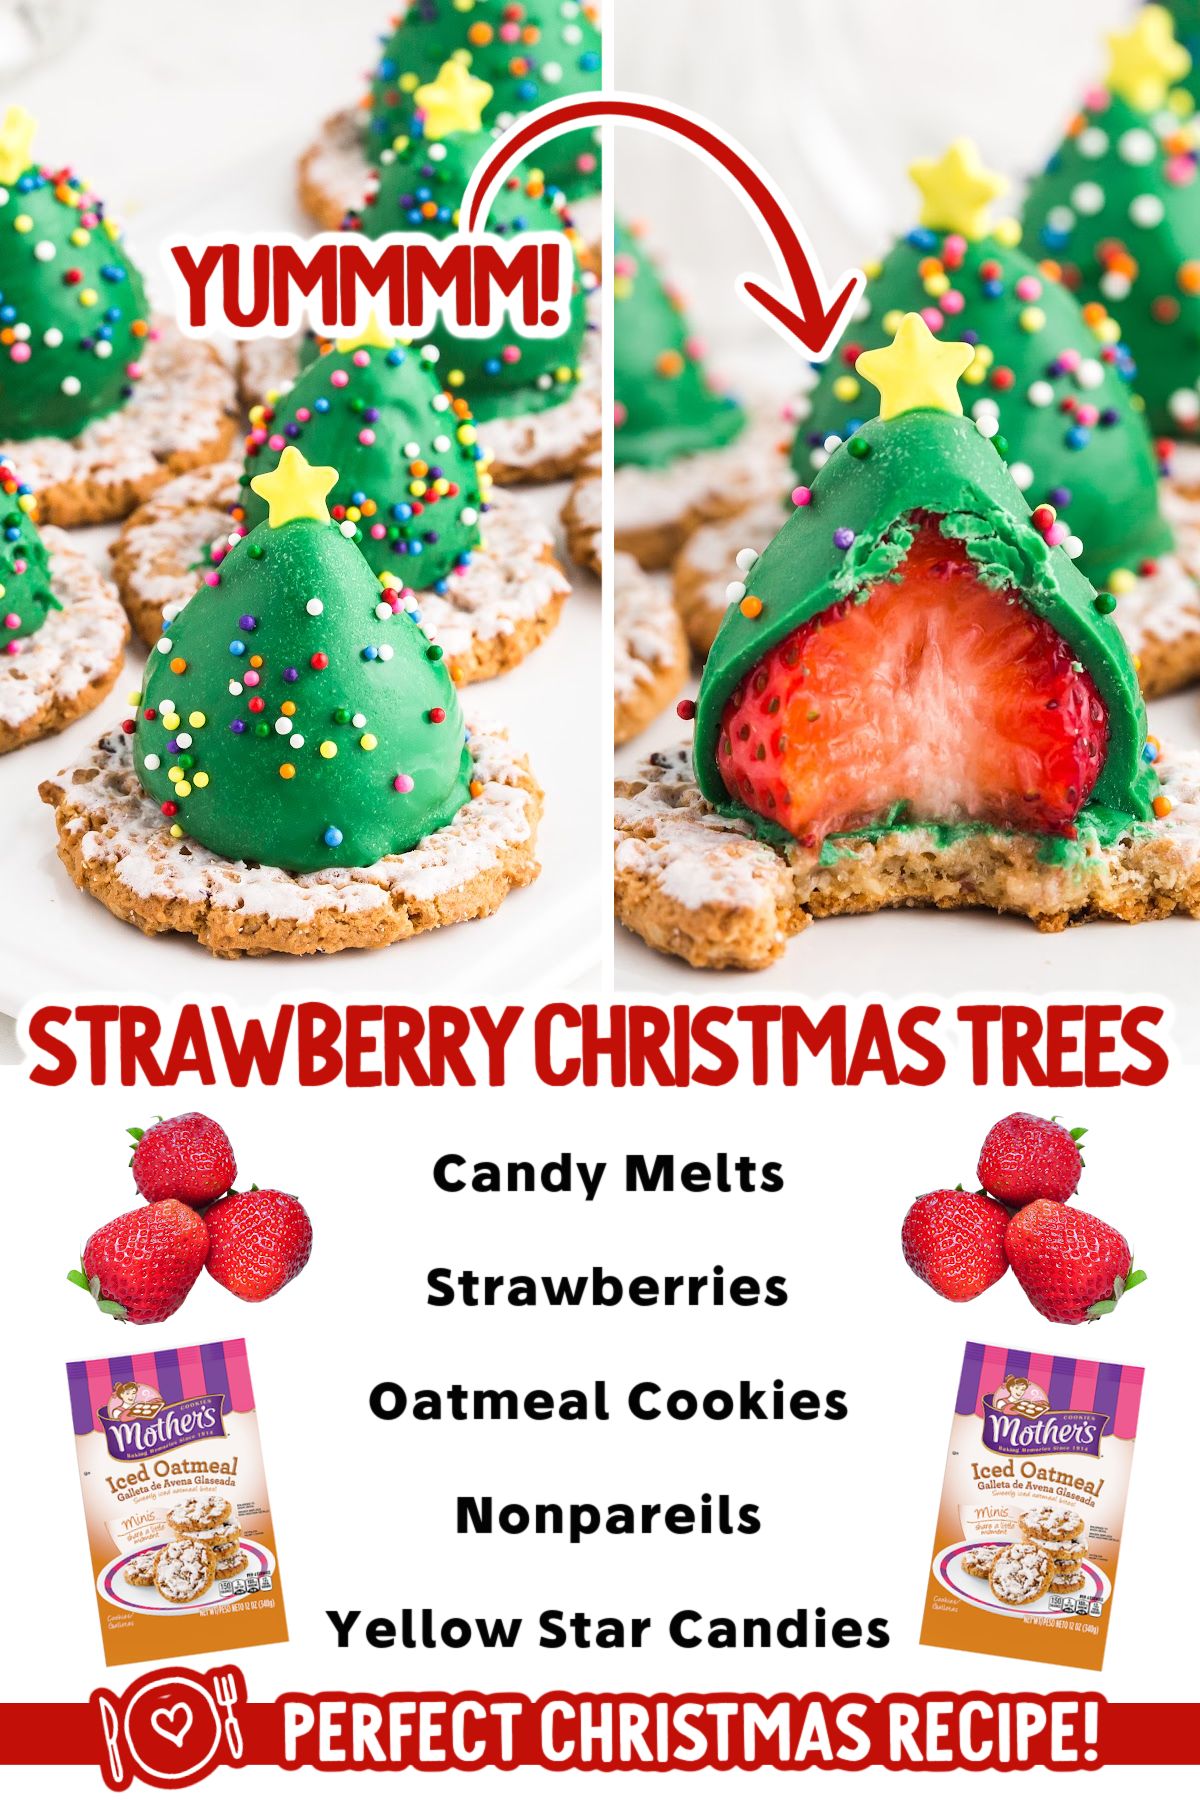
Dip the bottom of each strawberry into the melted green chocolate, coating the strawberry from the base to about halfway up. The chocolate will act as the “branches” of your Christmas tree.
After dipping, gently shake off any excess chocolate and place the strawberry on a parchment-lined baking sheet to set. Repeat this process for all the strawberries.
- Tip: If the chocolate starts to cool and thicken, simply reheat it in the microwave for a few seconds to make it smooth and easier to work with.
4. Add the Decorations
While the chocolate coating is still soft, it’s time to decorate your Christmas trees.
- Place mini marshmallows at the bottom of the strawberry to serve as the base of your tree, creating a “stump” look. You can attach them by gently pressing them into the chocolate.
- Use sprinkles, colored sugar, or mini candy canes as ornaments or garland around the tree. You can even add some edible glitter for a sparkling effect.
- For the tree topper, gently press a star-shaped sprinkle or a tiny candy star onto the top of each strawberry. If you don’t have a star sprinkle, you can use a small piece of a mini marshmallow or another fun decoration.
5. Let the Chocolate Set
Place the decorated strawberries in the refrigerator for about 10-15 minutes to allow the chocolate to fully set and harden. This will ensure the decorations stay in place and the trees hold their shape.
- Tip: If you’re in a hurry, you can also set them in the freezer for 5-10 minutes to speed up the process.
6. Serve and Enjoy!
Once the chocolate is set, your Strawberry Christmas Trees are ready to be served! Arrange them on a festive platter, and enjoy these adorable, sweet holiday treats.
Creative Variations
While the traditional version of Strawberry Christmas Trees uses white chocolate, feel free to get creative with different flavors and decorations. Here are some ideas:
- Chocolate Coating: Instead of white chocolate, you could use dark chocolate or milk chocolate for a different flavor.
- Sprinkles and Toppings: Experiment with different decorations, such as edible pearls, crushed candy canes, or colored frosting for a more intricate design.
- Mini Toppings: For extra flavor, you could drizzle a little bit of caramel sauce or chocolate syrup over the top before adding your sprinkles.
Tips for Making Perfect Strawberry Christmas Trees
- Choose Firm Strawberries: Pick strawberries that are firm and large enough to stand upright. Soft or overly ripe strawberries may not hold the chocolate as well.
- Let the Chocolate Cool Slightly: Make sure your chocolate isn’t too hot when dipping the strawberries—allow it to cool just slightly before dipping to avoid melting the berries.
- Decorate Immediately: Work quickly with the decorations while the chocolate is still warm and soft to ensure everything sticks.
- Use Parchment Paper: Lining your baking sheet with parchment paper makes it much easier to remove the strawberries once the chocolate has hardened.
- Get Creative with Flavors: If you want to take the flavors up a notch, try adding a little mint extract to your chocolate for a peppermint flavor or using flavored candy melts for added taste.
Why You’ll Love Strawberry Christmas Trees
- Simple and Quick: These cute and festive treats come together in just a few simple steps, making them perfect for last-minute holiday parties or family gatherings.
- Healthy-ish Holiday Treat: Made with fresh strawberries, this treat offers a sweet and refreshing balance to all the heavier holiday desserts, giving you the best of both worlds.
- Fun for All Ages: Kids love getting involved in decorating these trees, and they’re sure to be a hit with the whole family.
- Customizable: You can mix and match different chocolates, sprinkles, and toppings to make each tree uniquely your own.
Final Thoughts
These Strawberry Christmas Trees are a fun, festive, and delicious way to add some creativity and holiday cheer to your dessert table. With a beautiful combination of sweet strawberries, creamy chocolate, and colorful decorations, they make a perfect addition to your holiday spread.
Whether you’re planning a party, looking for a fun activity with the kids, or simply want to create a memorable edible gift, these cute little Christmas trees are sure to spread joy—and deliciousness—throughout the holiday season.
Enjoy making these sweet, edible Christmas trees, and have a merry, delicious holiday season! 🍓🎄🍫
ADVERTISEMENT
