ADVERTISEMENT
Instructions
Step 1: Activate the Yeast
Start by activating the yeast to ensure your bread rises perfectly. In a small bowl, combine the warm water with sugar and yeast. Stir gently, then let it sit for about 5 minutes, or until the mixture becomes frothy. This means the yeast is alive and ready to work its magic in the dough.
Step 2: Make the Dough
In a large mixing bowl, combine the flour and salt. Create a small well in the center and pour in the activated yeast mixture along with the olive oil. Stir until a dough begins to form, then use your hands or a dough hook to knead the dough on a lightly floured surface for about 5-7 minutes. You’re aiming for a soft, elastic dough that isn’t too sticky.
Step 3: Add the Cheese
Once your dough is smooth and elastic, gently fold in the shredded cheese. You can use any cheese you like, but a combination of cheddar and mozzarella offers the best of both worlds—cheddar adds a sharp, tangy flavor, while mozzarella brings a mild, gooey texture. If you like garlic or herbs, sprinkle in some garlic powder or dried oregano to infuse even more flavor.
Step 4: Let the Dough Rise
Place the dough in a lightly oiled bowl and cover it with a clean kitchen towel. Allow it to rise in a warm place for about 1-1.5 hours, or until it has doubled in size. This is the time for the yeast to work, giving your bread that airy, light texture.
Step 5: Shape and Bake the Bread
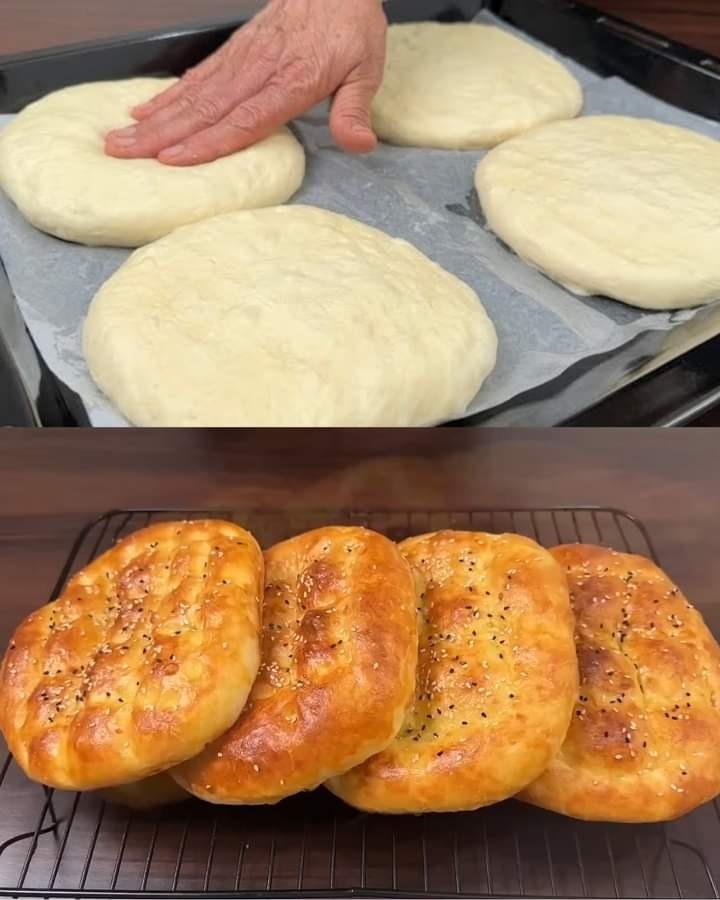
Preheat your oven to 375°F (190°C). Once the dough has risen, punch it down to release any air bubbles, then shape it into a loaf or divide it into smaller rolls, depending on your preference. Place your shaped dough onto a greased or parchment-lined baking sheet.
If you want a crispier crust, lightly brush the top of the dough with a little olive oil before baking. You can also sprinkle some extra cheese on top for an extra cheesy finish!
Bake in the preheated oven for 25-30 minutes, or until the bread is golden brown and sounds hollow when tapped on the bottom. For rolls, bake for around 15-18 minutes. Your kitchen will be filled with the mouthwatering aroma of melting cheese and freshly baked bread—it’s pure bliss!
Step 6: Let It Cool
After baking, let the bread cool on a wire rack for at least 10 minutes before slicing. This helps the bread set and makes it easier to cut without falling apart. The inside will be soft, slightly chewy, and packed with cheesy goodness, while the outside will have a beautiful golden-brown crust.
Tips for Success
- Cheese Variations: Feel free to experiment with different types of cheese. Gouda, Parmesan, or even a spicy pepper jack could add a unique flair to your bread.
- Herbs and Seasonings: Garlic, rosemary, thyme, or basil are excellent additions if you like a more aromatic, savory flavor.
- Storage: This bread is best eaten fresh, but you can store leftovers in an airtight container for up to 2 days. For longer storage, slice and freeze individual portions for easy access to cheesy bread whenever you like.
- Make It a Meal: This cheesy bread pairs wonderfully with soups, salads, or as a side to pasta dishes. You can also serve it with dips like marinara sauce or a creamy ranch dip for an indulgent treat.
Why You’ll Love This Recipe
The Simple Bread with Cheese Flavor is a game-changer for anyone who loves cheese and bread but doesn’t want to spend hours in the kitchen. With minimal ingredients, this recipe delivers maximum flavor, and the addition of cheese takes the bread from basic to extraordinary. Whether served fresh out of the oven or enjoyed the next day as a sandwich, this cheesy loaf is sure to become a household favorite.
Enjoy your homemade, cheesy bread masterpiece!
ADVERTISEMENT
