ADVERTISEMENT
5. Chill the Mixture
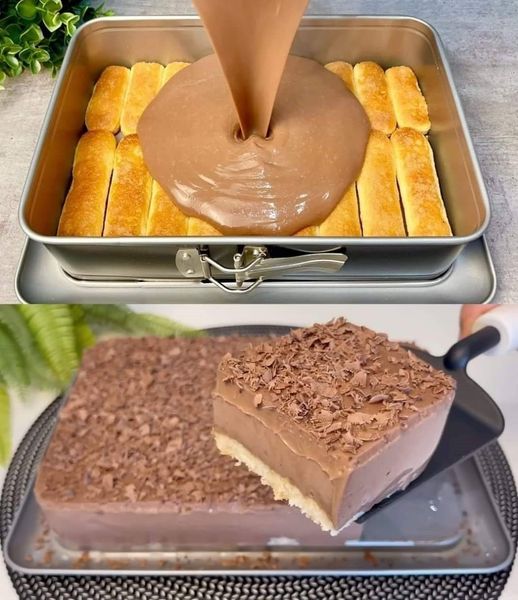
- Pour the chocolate-peanut butter mixture into a lined or greased dish, a silicone mold, or even a baking pan. Smooth out the surface with a spatula.
- For a firmer texture, place the dessert in the refrigerator and chill for about 30 minutes to an hour, or until set. If you’re in a hurry, pop it in the freezer for 10-15 minutes to speed things up.
6. Cut and Serve
- Once chilled and set, cut the dessert into squares, bars, or bite-sized pieces. You can also scoop spoonfuls of the dessert for a fun, more casual presentation.
- Top with sprinkles, a dusting of shredded coconut, or even a pinch of sea salt for an added contrast of flavor. If you’re serving this dessert at a party or gathering, fresh berries or a dollop of whipped cream are perfect finishing touches.
Variations and Customizations
While this basic dessert is already delicious, here are a few ways you can make it your own:
1. Chocolate Lovers’ Delight
- Use dark chocolate or a combination of milk and dark chocolate to create a richer, more decadent treat. You can also drizzle some caramel or chocolate syrup over the top for an extra indulgent touch.
2. Nutty and Crunchy
- Add some texture with crushed graham crackers, pretzels, or your favorite cereal. This will create a fun, crunchy contrast to the smooth, creamy filling.
3. Tropical Twist
- Add dried coconut flakes or chopped tropical fruits like mango and pineapple to give the dessert a refreshing, tropical flavor. You could also sprinkle some lime zest for a citrusy zing.
4. Vegan or Dairy-Free Version
- For a vegan or dairy-free version, simply substitute the chocolate chips with dairy-free chocolate, use coconut milk instead of sweetened condensed milk, and choose a plant-based butter or oil. Almond butter or cashew butter will work great as peanut butter alternatives.
Tips for the Best No-Oven, No-Flour Dessert
- Keep the Chilling Time in Mind: If you’re in a rush, you can speed up the chilling process by placing the dessert in the freezer for 10-15 minutes instead of the fridge. Just be sure not to leave it in for too long, or it may become too firm.
- Choose High-Quality Chocolate: Since the chocolate is the star of this dessert, choose a high-quality chocolate that you enjoy. The better the chocolate, the better the end result.
- Use a Non-Stick Pan or Liner: To make the removal process easier, line your pan or dish with parchment paper or use a silicone baking pan. This will help prevent the dessert from sticking and ensure smooth removal.
- Add Texture Wisely: If you’re adding marshmallows or nuts, make sure to gently fold them in after the mixture has cooled slightly. This ensures they stay intact and don’t get too mushy in the hot mixture.
Why This No-Oven, No-Flour Dessert is a Winner
This No Oven, No Flour Quick Dessert is the ultimate solution for anyone craving something sweet but without the time or equipment to bake. It’s a great option when you’re out of flour, in need of a dessert on short notice, or just want a quick, indulgent treat that requires minimal effort. Whether you’re making it for yourself, your family, or a last-minute get-together, this dessert will definitely impress.
With its creamy, chocolatey base, customizable mix-ins, and no-bake convenience, this dessert is a simple yet satisfying way to end any meal. In just 10 minutes, you can have a delicious, indulgent dessert without the fuss of baking. Try it today and see just how easy it is to satisfy your sweet tooth with minimal effort!
Happy Cooking!
ADVERTISEMENT
