ADVERTISEMENT
Instructions
1. Prepare the Oreo Crust
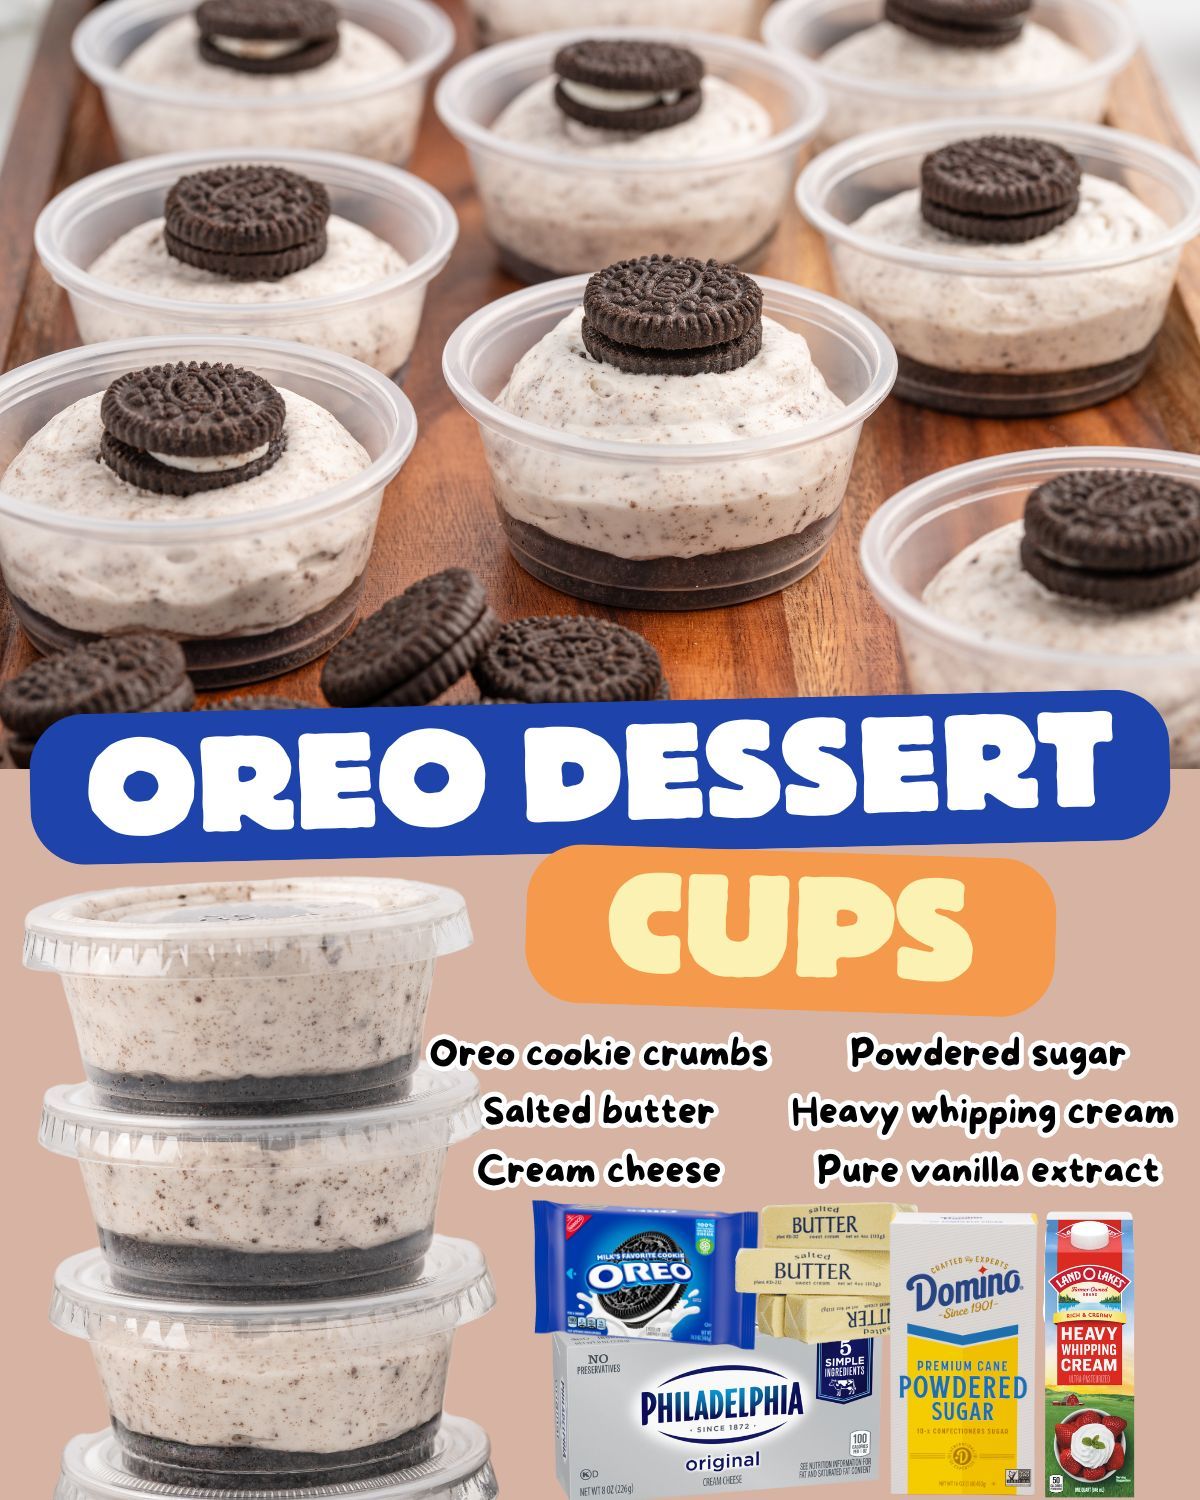
Start by crushing the Oreo cookies into fine crumbs. You can do this by placing them in a Ziploc bag and using a rolling pin to crush them, or you can pulse them in a food processor until they form a fine crumb. Set aside about 2 tablespoons of the crumbs for garnish at the end.
- For an even richer taste, you can use double-stuffed Oreos, as the filling adds extra creaminess to the crust.
Next, transfer the crushed Oreos to a bowl and add melted butter (about 4 tablespoons). Stir well to combine until the mixture has a damp, sand-like texture.
- The butter helps bind the crumbs together, creating a sturdy base for your dessert cups.
Spoon about 2 tablespoons of the Oreo mixture into the bottom of each cup (use small glass jars, dessert cups, or even muffin tins). Press down gently with the back of a spoon to form an even, compact layer.
- If you want a thicker crust, feel free to add a bit more of the crushed Oreos and press it down tightly.
Once the Oreo crust is ready, place the cups in the refrigerator for 10-15 minutes to firm up while you prepare the filling.
2. Make the Creamy Filling
In a large mixing bowl, beat the softened cream cheese with a hand mixer or stand mixer until smooth and creamy. Add the powdered sugar and vanilla extract, and beat again until fully incorporated.
- The cream cheese gives the filling that rich, tangy taste that pairs perfectly with the sweetness of the Oreos.
In a separate bowl, whip the heavy cream and granulated sugar together until stiff peaks form. You can use an electric mixer or a whisk if you prefer to do it by hand. Be careful not to over-whip the cream—you want it to be fluffy but not curdled.
- The whipping cream will add lightness and a creamy texture to the filling, making it airy and smooth.
Once the cream is whipped, gently fold it into the cream cheese mixture using a spatula. Be careful to keep the mixture light and fluffy as you combine them.
- The result should be a thick, smooth filling that will easily hold its shape in the dessert cups.
3. Assemble the Oreo Dessert Cups
Now it’s time to assemble your dessert cups! Remove the Oreo crusts from the refrigerator and spoon about 2 tablespoons of the creamy filling into each cup over the crust. Smooth the top with the back of a spoon or an offset spatula.
- You can layer the filling higher or create a few layers if you prefer more filling. It’s all about how much Oreo goodness you want in each bite!
After filling each cup, top them with the reserved Oreo crumbs or a mini Oreo for decoration. You can also add more crushed Oreos or even drizzle some chocolate syrup on top for extra flavor.
4. Chill and Set
Place the assembled Oreo dessert cups back in the refrigerator for at least 1-2 hours, or until the filling is set and firm. This chilling time allows the layers to fully firm up and the flavors to meld together, creating that perfect creamy, Oreo-packed experience.
- If you’re in a hurry, you can chill them in the freezer for about 30-45 minutes, but be sure not to freeze them solid.
5. Serve and Enjoy!
Once your Oreo Dessert Cups are chilled and set, they’re ready to be served. Simply grab a spoon and dig in to the creamy, dreamy layers of Oreo goodness!
Tips for the Best Oreo Dessert Cups
- Use a Variety of Oreo Flavors: While classic Oreo cookies are a fan favorite, you can mix it up by using different Oreo flavors, such as mint, birthday cake, or peanut butter. These will give your dessert cups a unique twist!
- Make Ahead: Oreo Dessert Cups are perfect for making ahead. You can prepare them a day or two in advance, allowing the flavors to blend even better as they sit in the fridge.
- Customize the Toppings: If you want to get creative, top your Oreo dessert cups with other fun additions, like whipped cream, chocolate shavings, chopped nuts, or even a drizzle of caramel sauce.
- Opt for Gluten-Free Oreos: For a gluten-free version, swap out regular Oreos for gluten-free Oreos. They taste just as good and allow those with dietary restrictions to enjoy the treat.
- Mini Serving Sizes: If you’re serving a large crowd or hosting a party, consider making mini Oreo dessert cups in smaller jars or cups for easier serving.
Why You’ll Love Oreo Dessert Cups
Oreo Dessert Cups are the perfect treat for anyone who loves the classic Oreo cookie combination of chocolate and cream. Here’s why you’ll adore this recipe:
- No-Bake Simplicity: With minimal prep and no oven required, these dessert cups come together quickly and easily.
- Layered Deliciousness: Each bite of the Oreo dessert cups gives you the perfect balance of creamy filling, crunchy Oreo crust, and a rich topping—making it a mouthwatering treat.
- Customizable: You can change up the layers, flavors, and toppings to suit your taste. The possibilities are endless!
- Crowd-Pleasing: Whether you’re serving them at a party, as a family dessert, or bringing them to a potluck, Oreo dessert cups are always a hit with both kids and adults.
Final Thoughts
If you’re looking for a quick, delicious, and impressive dessert that combines all the best parts of your favorite cookie, Oreo Dessert Cups are the answer. With their perfect layers of creamy filling, crunchy Oreos, and endless customization options, these cups are guaranteed to satisfy any sweet tooth.
Whether you’re hosting a party or simply craving something indulgent, these Oreo dessert cups are sure to become your new favorite treat. No baking, no hassle, just pure Oreo bliss in every bite!
Enjoy! 🍪🍫🎉
ADVERTISEMENT
