ADVERTISEMENT
Ingredients for Ideal Mini Donuts
Here’s what you’ll need to make these delightful little donuts:
- 1 ½ cups all-purpose flour
- ¾ cup granulated sugar
- 1 teaspoon baking powder
- ½ teaspoon baking soda
- ½ teaspoon salt
- ½ teaspoon ground cinnamon (optional, for a hint of spice)
- 1 large egg
- ¾ cup milk (whole, 2%, or a non-dairy alternative)
- 2 tablespoons unsalted butter, melted
- 1 teaspoon vanilla extract
- ½ teaspoon almond extract (optional, adds a nice depth of flavor)
- Non-stick spray (for greasing the donut pan)
For the glaze (optional):
- 1 cup powdered sugar
- 2 tablespoons milk (or more for desired consistency)
- 1 teaspoon vanilla extract
- Pinch of salt
For toppings (optional):
- Cinnamon sugar (½ cup sugar mixed with 1 tablespoon cinnamon)
- Sprinkles (for a fun touch)
- Chopped nuts (like pecans or walnuts)
- Chocolate chips (for a decadent twist)
How to Make Ideal Mini Donuts
Step 1: Preheat the Oven and Prepare the Donut Pan
- Preheat your oven to 375°F (190°C). Grease a mini donut pan with non-stick spray or lightly coat it with a bit of butter or oil to ensure the donuts don’t stick.
- If you don’t have a mini donut pan, you can also use a regular muffin tin to bake donut holes, but a donut pan will give them their traditional ring shape.
Step 2: Mix Dry Ingredients
- In a medium bowl, combine flour, sugar, baking powder, baking soda, salt, and cinnamon (if using). Whisk the dry ingredients together until evenly blended.
Step 3: Mix Wet Ingredients
- In a separate bowl, whisk together the egg, milk, melted butter, vanilla extract, and almond extract (if using). Make sure the butter has cooled slightly before adding it to avoid cooking the egg.
Step 4: Combine Wet and Dry Ingredients
- Pour the wet ingredients into the dry ingredients and stir until just combined. Be careful not to overmix the batter. Overmixing can result in dense donuts, so stir gently until there are no visible pockets of flour, but it’s okay if the batter is a bit lumpy.
Step 5: Fill the Donut Pan
- Spoon the batter into the donut pan, filling each cavity about ¾ full. You can also use a piping bag or a plastic zip-top bag with the tip cut off to pipe the batter into the pan for a neater process.
Step 6: Bake the Donuts
- Place the donut pan in the preheated oven and bake for 8-10 minutes, or until the donuts are golden brown and a toothpick inserted into the center comes out clean.
- Once baked, allow the mini donuts to cool in the pan for a few minutes before transferring them to a wire rack to cool completely.
Step 7: Add the Glaze (Optional)
- If you’d like to add a glaze, whisk together the powdered sugar, milk, vanilla extract, and pinch of salt in a small bowl until smooth. Adjust the consistency by adding more milk for a thinner glaze or more powdered sugar for a thicker glaze.
- Dip each cooled donut into the glaze, then place it back on the wire rack to set. For extra flair, you can sprinkle toppings like cinnamon sugar, chopped nuts, or sprinkles while the glaze is still wet.
Tips for the Perfect Mini Donuts
- Don’t Overfill the Pan: To ensure your mini donuts rise evenly and retain their shape, avoid overfilling the cavities. Filling them about ¾ full is the sweet spot.
- Flavor Variations: Experiment with adding chocolate chips, blueberries, or a dash of nutmeg to the batter for different flavor profiles. You can also substitute the vanilla extract with maple or coconut extract for a twist.
- Make It a Donut Bar: Set up a DIY donut bar with various toppings such as chocolate drizzle, crushed candy, colored sugars, and frosting for a fun and customizable treat. Perfect for parties or a family brunch!
- Storage: These mini donuts are best enjoyed fresh, but if you have leftovers, store them in an airtight container at room temperature for up to 2 days. For longer storage, freeze them and reheat in the oven for a quick snack.
Why These Mini Donuts Are Ideal
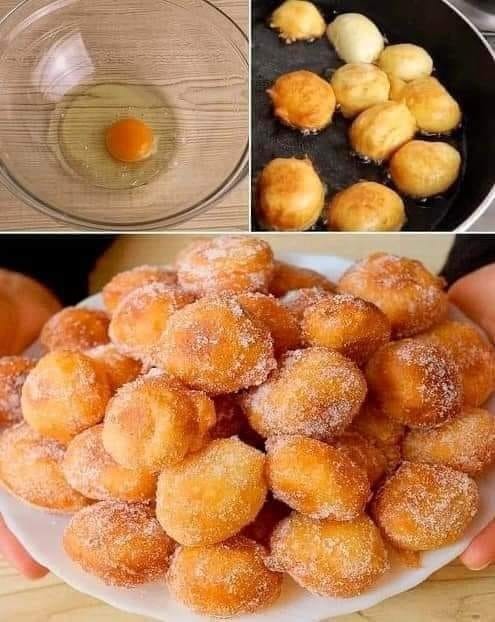
Ideal Mini Donuts are the perfect balance of soft, fluffy texture and sweet flavor. Unlike store-bought donuts that are often loaded with preservatives and artificial flavors, these homemade mini donuts offer a fresher, healthier alternative. And because they’re baked instead of fried, they’re lighter and less greasy—so you can enjoy a sweet treat without feeling weighed down.
Their small size makes them perfect for sharing, and they can easily be customized to suit any flavor profile or occasion. Whether you’re making them for a family breakfast, a party, or simply for an afternoon snack, these mini donuts are sure to be a hit with everyone.
Conclusion: A Bite-Sized Delight
If you’re looking for a fun, easy, and delicious treat that everyone will love, Ideal Mini Donuts are the way to go. With their light, fluffy texture and endless flavor possibilities, they’re the perfect solution for any occasion. Whether you enjoy them plain with a dusting of sugar or fully glazed and decorated, these mini donuts are sure to bring joy to your kitchen—and to your taste buds. So, grab your donut pan and get ready to bake a batch of these irresistible, bite-sized treats!
ADVERTISEMENT
