ADVERTISEMENT
Step-by-Step Guide to Growing Orchids in Water
Step 1: Prepare the Orchid
- Remove the Orchid from its Pot: Gently take your orchid out of its existing pot, being careful not to damage the roots. If the plant is in a bark mix or soil, shake off as much of it as possible without causing stress to the roots.
- Inspect the Roots: Examine the roots carefully. Healthy orchid roots should be firm and green or silver-gray. Trim off any dead, mushy, or discolored roots with clean scissors or pruning shears.
- Rinse the Roots: Once the dead roots have been removed, rinse the remaining healthy roots under lukewarm water to remove any dirt or debris.
Step 2: Set Up the Container
- Choose the Right Container: Select a container that is large enough to comfortably hold the orchid’s roots without overcrowding. The container should also be transparent, so you can monitor the water level and root health easily.
- Add a Layer of Pebbles or Rocks (Optional): If you’d like to give the orchid some additional stability, place small pebbles or aquarium gravel in the bottom of the container. This helps to anchor the roots and prevents the plant from toppling over in the water. Be sure not to bury the roots—just support them gently.
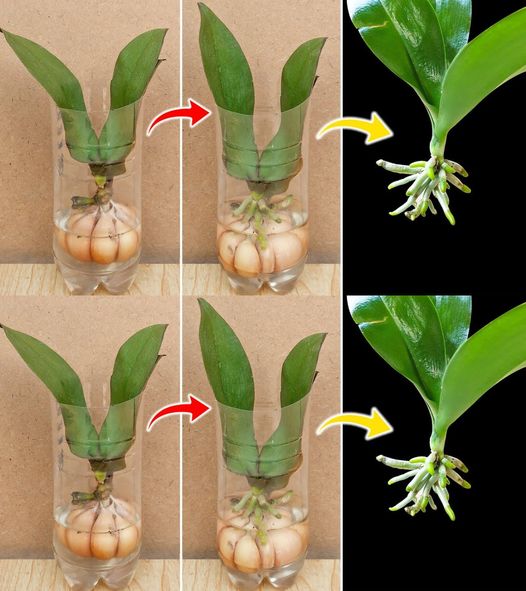
- Place the Orchid in the Container: Carefully position the orchid in the container so that its roots are submerged in water but the stem and leaves are not touching the water. The orchid should sit comfortably in the container, with its roots supported by the rocks or gravel if you choose to use them.
Step 3: Add Water and Nutrients
- Watering: Fill the container with water until the roots are just submerged. Be sure the water level doesn’t rise above the base of the stem or leaves, as this can lead to rot. Use purified, distilled, or rainwater to avoid chemicals and salts found in tap water that can harm the plant.
- Nutrients (Optional): While orchids can survive in just water, adding a diluted orchid-specific liquid fertilizer (or hydroponic nutrient solution) can encourage better growth and flowering. Follow the manufacturer’s instructions for diluting the fertilizer—too much fertilizer can damage the roots.
- Check for Oxygen Flow: Orchids need oxygen at the roots, so it’s essential to ensure the water isn’t stagnant. You can gently stir the water every few days or even use an aquarium pump to aerate the water if you’re using a closed container.
Step 4: Maintenance and Care
- Change the Water Regularly: To keep your orchid healthy, change the water every week or two. This ensures that any buildup of salts, minerals, or nutrients is removed. It also gives you a chance to inspect the roots and prevent the growth of algae or bacteria.
- Monitor Root Health: Regularly check the roots for any signs of rot, such as mushy, brown, or black areas. If any roots start to show signs of rot, trim them immediately with sterilized scissors or pruning shears.
- Provide Proper Lighting: Orchids still need light to thrive, even when grown in water. Place your orchid in a spot that receives bright, indirect sunlight. Avoid direct sunlight, as this can cause the water to heat up too much and harm the roots.
- Temperature and Humidity: Orchids prefer a warm, humid environment. Keep your orchid in a room that stays between 65°F and 75°F (18°C to 24°C), with humidity levels around 50-70%. If your home is too dry, consider using a humidity tray or a humidifier to keep the air moist.
Common Mistakes to Avoid
While growing orchids in water is relatively easy, there are a few common pitfalls to avoid:
- Overwatering or Submerging the Stem: Always ensure the water level stays below the base of the orchid’s stem and leaves. If water touches the stem, it can cause rot.
- Using Tap Water: Tap water contains minerals, chlorine, and fluoride, all of which can harm your orchid’s roots over time. Always use purified, distilled, or rainwater.
- Stagnant Water: Orchids require oxygen at their roots. If the water is allowed to stagnate, the roots can suffocate and rot. Change the water regularly and consider adding aeration if needed.
- Lack of Light: Orchids need light to thrive. Keep your orchid in a location that receives plenty of indirect light, such as near a bright window, but avoid direct sunlight.
- Not Monitoring for Root Health: Regularly inspect the orchid’s roots for any signs of rot or decay, and trim damaged roots promptly to prevent the problem from spreading.
Final Thoughts
Growing orchids in water is an innovative and low-maintenance way to enjoy these beautiful plants. With the right setup and care, your orchids can thrive in this hydroponic environment. The key is to monitor water levels, change the water regularly, and ensure the roots are getting enough oxygen. By following these guidelines, you can enjoy the beauty of orchids without the hassle of soil or bark.
Whether you’re a beginner or a seasoned plant enthusiast, growing orchids in water offers a simple, effective way to care for these stunning plants. Happy growing!
ADVERTISEMENT
