ADVERTISEMENT
Instructions
Step 1: Activate the Yeast
Start by activating your yeast. In a small bowl, combine warm milk and granulated sugar, stirring until the sugar dissolves. Sprinkle the active dry yeast over the top and let it sit for about 5–10 minutes until it becomes foamy. This step is essential to make sure your yeast is active and ready to help the dough rise.
Step 2: Mix the Dough
In a large mixing bowl, add the softened butter, salt, and about 2 cups of flour. Once the yeast mixture is ready, pour it into the bowl along with the egg. Using a spoon or stand mixer with a dough hook attachment, stir the mixture until everything is combined. Gradually add the remaining flour, about 1/4 cup at a time, until the dough starts pulling away from the sides of the bowl.
Step 3: Knead the Dough
Once the dough is formed, turn it out onto a lightly floured surface. Knead the dough for about 5–7 minutes, or until it becomes smooth and elastic. If you’re using a stand mixer, you can let the machine do the kneading for you, but it’s a therapeutic and satisfying process to do by hand.
Step 4: First Rise
After kneading, shape the dough into a ball and place it in a greased bowl. Cover with a clean kitchen towel or plastic wrap and let it rise in a warm, draft-free area for about 1–1.5 hours, or until the dough has doubled in size.
Step 5: Shape the Rolls
Once the dough has risen, punch it down to release any air bubbles. Turn the dough out onto a floured surface and divide it into 12 even pieces. Roll each piece into a smooth ball, tucking the edges underneath to create a round shape. Place the rolls in a greased 9×13-inch baking dish, arranging them so they are close together, but not touching.
Step 6: Second Rise
Cover the shaped rolls with a towel and let them rise again for about 30 minutes, or until they’ve puffed up and filled the baking dish.
Step 7: Bake the Rolls
Preheat your oven to 350°F (175°C). Once the rolls have risen, place them in the oven and bake for about 20–25 minutes, or until they are golden brown on top. Keep an eye on them towards the end of the baking time to avoid over-baking.
Step 8: Brush with Butter
As soon as the rolls come out of the oven, brush the tops with melted butter for an extra rich flavor and a glossy finish. The buttery sheen will make the rolls look as good as they taste!
Step 9: Serve and Enjoy
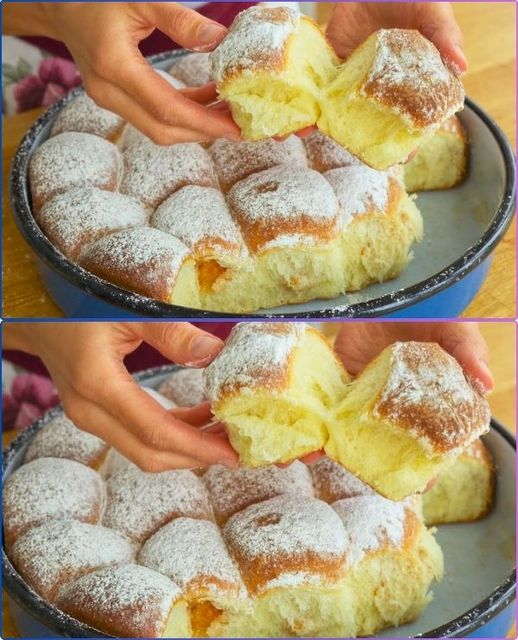
Allow the rolls to cool slightly before serving. Pull apart each roll and savor the warm, soft interior. These rolls are perfect on their own or with your favorite spreads, but they also complement a wide variety of main dishes like roasted meats, soups, and salads.
Tips for Perfect Dinner Rolls
- Milk Temperature: Make sure the milk is warm, not hot, to avoid killing the yeast. If it’s too hot, it can prevent the dough from rising properly.
- Kneading: If you’re kneading by hand, be patient! Kneading the dough thoroughly is key to developing gluten, which gives the rolls their soft and fluffy texture.
- Don’t Rush the Rise: Allow both rises to happen at room temperature or in a warm spot. If the dough doesn’t rise enough, the rolls might be dense instead of light and airy.
- Use a Baking Dish: Using a 9×13-inch baking dish helps the rolls stay close together while baking, creating a pull-apart texture that makes them irresistible.
- Add Herbs or Garlic: If you want to elevate the flavor even more, feel free to mix in fresh herbs, such as rosemary or thyme, into the dough. Garlic lovers can also brush the tops of the rolls with garlic butter instead of plain melted butter for an extra savory twist.
- Storage: These dinner rolls are best enjoyed fresh, but you can store any leftovers in an airtight container for up to 2 days. To refresh them, reheat in the oven for a few minutes or microwave for a few seconds.
Why These Rolls Are Worth the Effort
There’s something incredibly satisfying about making your own bread from scratch, especially when the result is as delicious as these Heavenly Dinner Rolls. From the moment the dough hits the oven, you’ll be treated to the comforting aroma of freshly baked bread, and the texture and flavor will leave you wanting more. These rolls are perfect for any occasion—whether you’re serving them alongside a weeknight dinner, a holiday spread, or simply enjoying them with a bit of butter and jam for breakfast.
The best part? You can customize them to suit your taste. Add a little garlic, top them with sea salt, or even drizzle them with honey for a sweet twist. No matter how you serve them, these dinner rolls will undoubtedly become a cherished staple in your kitchen.
Conclusion
Making your own homemade Heavenly Dinner Rolls might take a little time, but the result is a melt-in-your-mouth experience that’s truly worth the effort. Soft, buttery, and perfectly fluffy, these rolls will become the star of any meal, whether it’s a casual family dinner or a festive holiday spread. Give this recipe a try, and prepare for your taste buds to be delighted!
ADVERTISEMENT
