ADVERTISEMENT
Instructions:
1. Pop the Popcorn:
Start by popping your popcorn kernels. You can do this in a popcorn maker, on the stovetop, or in the microwave. If you’re popping on the stovetop, heat the vegetable oil in a large pot over medium heat. Add the kernels, cover the pot, and shake occasionally until the popping slows down. Once done, remove the pot from the heat and set it aside.
Place the freshly popped popcorn in a large bowl, making sure to remove any unpopped kernels. You’ll need about 12 cups of popped popcorn to make sure there’s enough caramel to coat every kernel.
2. Make the Caramel Sauce:
In a medium saucepan over medium heat, melt the unsalted butter. Once the butter is melted, add the brown sugar, corn syrup, and salt. Stir the mixture together and bring it to a gentle simmer. Once it starts to boil, let it cook for about 5-7 minutes without stirring, allowing it to thicken and bubble up. Keep an eye on it to prevent it from burning.
After the caramel has simmered for a few minutes, remove it from the heat and carefully stir in the vanilla extract and baking soda. The mixture will bubble up slightly, so be cautious. The baking soda will help the caramel become lighter and airier as it cools.
3. Coat the Popcorn:
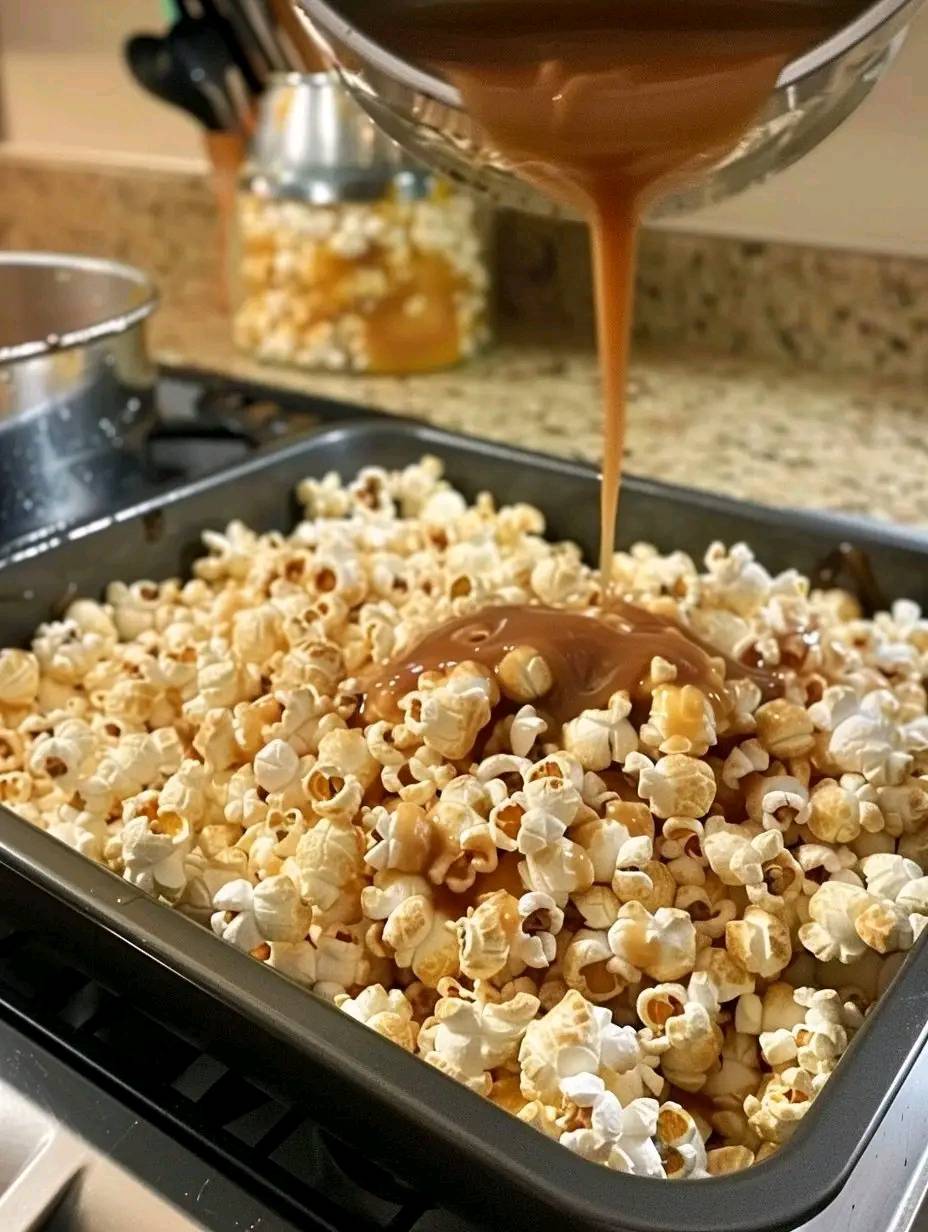
Pour the hot caramel sauce over the popped popcorn in the large bowl. Use a spatula or a large spoon to gently stir the popcorn, making sure all the kernels are evenly coated with the caramel. Take your time and be gentle, so you don’t crush the popcorn.
4. Bake the Caramel Corn:
Preheat your oven to 250°F (120°C). Line a baking sheet with parchment paper or a silicone baking mat to prevent the caramel from sticking.
Transfer the caramel-coated popcorn onto the prepared baking sheet in an even layer. Bake the popcorn in the preheated oven for about 45-60 minutes, stirring the popcorn every 15 minutes to ensure that the caramel coats the popcorn evenly and doesn’t burn.
The low baking temperature helps the caramel set and form a crispy, glossy coating around each kernel. You’ll notice the caramel corn crisping up as it bakes.
5. Cool and Serve:
Once the caramel corn is done baking, remove it from the oven and let it cool completely on the baking sheet. As it cools, the caramel will harden, giving you that perfect crunchy texture.
Once cooled, break the caramel corn into pieces and store it in an airtight container. It should stay fresh for about 1-2 weeks, but it’s so tasty, it probably won’t last that long!
Tips for the Best Caramel Corn:
- Don’t overcook the caramel: Make sure to cook the caramel sauce for just the right amount of time. If it cooks for too long, it can become too hard and brittle. Aim for a golden-brown color and a simmer time of 5-7 minutes.
- Stir frequently while baking: Stirring the popcorn every 15 minutes during baking ensures that every kernel is evenly coated and that the caramel doesn’t burn. It’s also the secret to achieving that perfect crunchy texture!
- Add nuts: Want to take your caramel corn to the next level? Add some toasted pecans, almonds, or walnuts to the popcorn before coating it in caramel. Nuts add a delicious crunch and a bit of richness to the overall flavor.
- Make it salty-sweet: If you love the sweet-and-salty flavor combo, sprinkle a little sea salt over the caramel corn after it’s baked and still warm. It enhances the sweetness and creates a balance that’s totally addictive.
- Storage: Store your homemade caramel corn in an airtight container at room temperature. If you want to keep it fresh longer, you can store it in a sealed bag or container in the fridge, but it’s best enjoyed fresh within a week or so.
Why You’ll Keep Coming Back for This Recipe:
This Caramel Corn recipe is the perfect snack to indulge in when you want something that’s sweet, crunchy, and satisfying. The combination of buttery, caramel goodness with light, crispy popcorn makes it a treat that’s hard to resist. Whether you’re making it for a special occasion, a family gathering, or just because you’re craving something sweet, it’s sure to be a hit!
The best part? This recipe is so easy to follow, and once you taste the homemade version, you won’t want to go back to the store-bought stuff. The homemade caramel coating is not only delicious but also a lot fresher and more flavorful than what you’ll find in a bag.
So go ahead, grab the ingredients, and get ready to make a batch of this caramel corn—you won’t regret it! Don’t lose this recipe; it’s one you’ll want to keep on hand for all your snacking needs.
ADVERTISEMENT
