ADVERTISEMENT
Instructions
1. Prepare the Crust
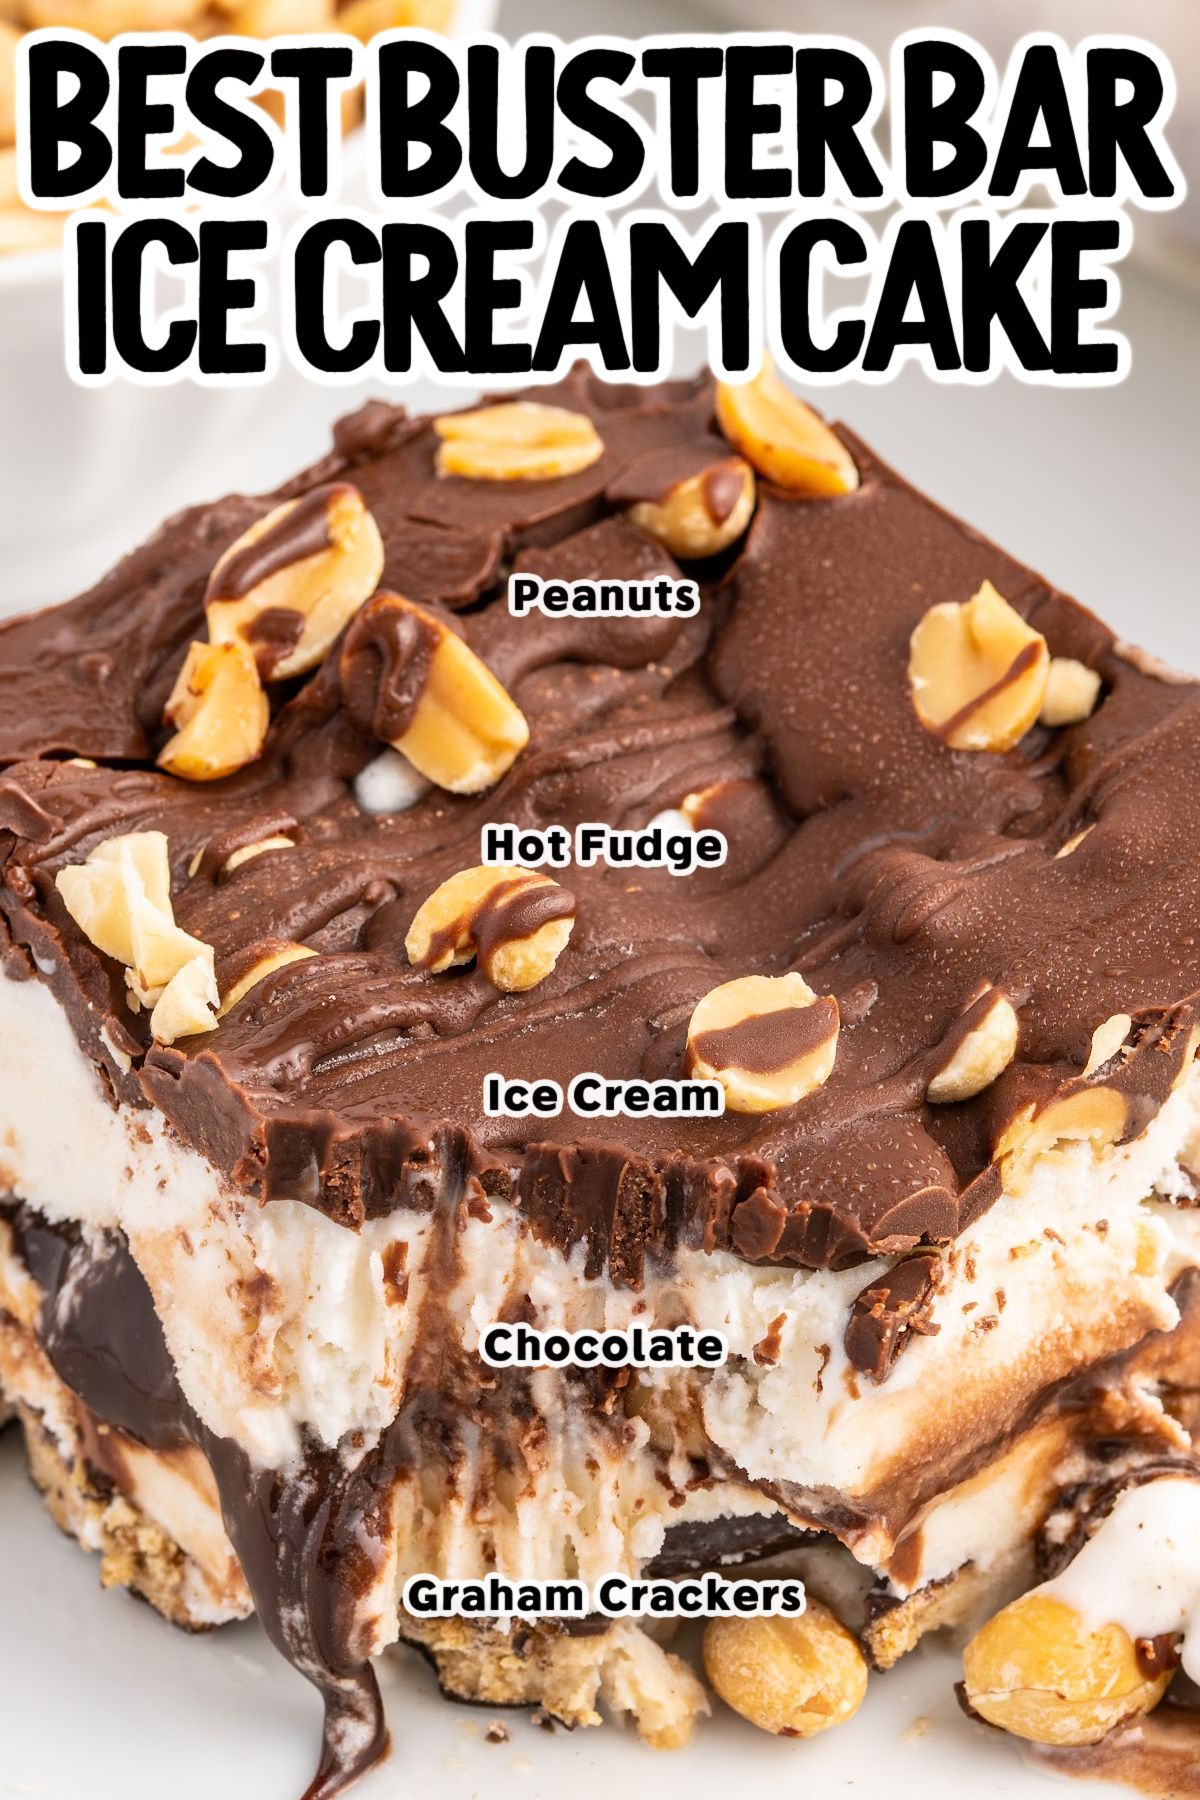
Start by making the crust for your cake. In a medium saucepan, melt the butter over low heat. Once melted, remove from heat and stir in the graham cracker crumbs and sugar until well combined. This mixture will give your ice cream cake a sweet, crunchy base that mimics the taste of a traditional Buster Bar.
- Tip: If you prefer a firmer, more solid crust, you can use a bit more butter to make the crumbs stick together even better.
Once the mixture is ready, press it into the bottom of a 9-inch springform pan (or a pie dish if you don’t have a springform pan) to create an even layer. Place the pan in the freezer to set for about 15-20 minutes while you prepare the other layers.
2. Layer the Vanilla Ice Cream
While the crust is chilling, allow the vanilla ice cream to soften at room temperature for about 5-10 minutes, so it’s easier to spread.
Once it’s softened, remove the pan from the freezer and spread a thick layer of the softened vanilla ice cream over the graham cracker crust. Use a spatula to spread it evenly across the pan. You want a nice, even layer that will be the heart of your Buster Bar cake.
- Tip: If you’re looking to make the cake extra creamy, you can add a second layer of ice cream.
Return the pan to the freezer and let the ice cream firm up for about 30 minutes before proceeding to the next step.
3. Add the Peanut Layer
While the ice cream is setting, it’s time to prepare the peanut layer. Roughly chop your peanuts (you can use salted, unsalted, or honey-roasted depending on your preference) and sprinkle them evenly over the ice cream layer once it’s firm. The peanuts add a satisfying crunch that will mimic the nutty crunch in a traditional Buster Bar.
Once the peanuts are spread evenly, return the pan to the freezer for an additional 20-30 minutes to allow the peanuts to set.
4. Add the Caramel and Hot Fudge Layers
Now comes the fun part! In a small bowl, warm up the caramel sauce and hot fudge sauce in the microwave for about 20-30 seconds, just to make them more spreadable.
After the peanuts have set, carefully drizzle the warm caramel sauce and hot fudge sauce over the top of the peanuts. You can create a swirl pattern or simply drizzle both sauces over the top.
Return the cake to the freezer once more, and let it freeze for at least 1 hour to set fully.
5. Finish with Whipped Topping and Garnishes
After the cake has frozen completely, it’s time for the final touch. Spread a layer of whipped topping (you can use store-bought or homemade) over the top of the cake. You can pipe it for a more decorative look or simply spread it evenly.
To finish, sprinkle some chopped peanuts, chocolate chips, or additional drizzles of caramel or hot fudge for added flair. These toppings add a beautiful texture and elevate the cake’s appearance.
6. Freeze and Serve
Once your Buster Bar Ice Cream Cake is fully assembled, return it to the freezer for at least 2-3 hours to allow everything to set up perfectly.
When you’re ready to serve, carefully remove the cake from the springform pan (if using), and slice it into wedges. If you find it difficult to slice right away, let the cake sit at room temperature for a few minutes to soften slightly.
Tips for Perfecting Your Buster Bar Ice Cream Cake
- Use a Springform Pan: A springform pan makes it easy to remove the cake and serve it beautifully. If you don’t have one, you can use a regular round pan or even a pie dish, but make sure to line it with parchment paper for easy removal.
- Soften Ice Cream Before Spreading: Softening the ice cream before spreading it on the crust makes it much easier to spread evenly, creating a smoother texture. Just be sure not to leave it out too long to avoid melting.
- Chill Between Layers: Allow each layer of the cake to freeze properly before adding the next layer. This helps ensure that the ice cream stays firm and the layers don’t mix.
- Customize the Flavor: Feel free to experiment with different ice cream flavors. For example, you could use chocolate ice cream, peanut butter ice cream, or even coffee ice cream to give your Buster Bar cake a unique twist.
- Add More Toppings: You can never go wrong with extra toppings! Consider adding chocolate chips, crushed Oreos, or even butterfingers to make it even more decadent.
Why You’ll Love Buster Bar Ice Cream Cake
- No-Bake: This cake doesn’t require any baking, making it an easy and low-effort dessert to put together.
- Family-Friendly: This dessert is a hit with kids and adults alike. Its combination of ice cream, chocolate, caramel, and peanuts makes it a universally loved treat.
- Perfect for Celebrations: Whether it’s a birthday, holiday, or a casual get-together, this Buster Bar Ice Cream Cake will definitely steal the show and leave your guests asking for the recipe.
Final Thoughts
This Buster Bar Ice Cream Cake is a deliciously indulgent dessert that brings together all the best flavors of the beloved Dairy Queen treat in a fun, homemade form. With its layers of creamy ice cream, crunchy peanuts, gooey caramel and fudge, and a buttery graham cracker crust, it’s the perfect dessert for any occasion.
Whether you’re making it for a special event or just to satisfy your sweet tooth, this cake is sure to become a favorite in your dessert repertoire.
Enjoy the sweetness and indulgence of this delicious, frozen treat! 🍫🍦🎂
ADVERTISEMENT
