ADVERTISEMENT
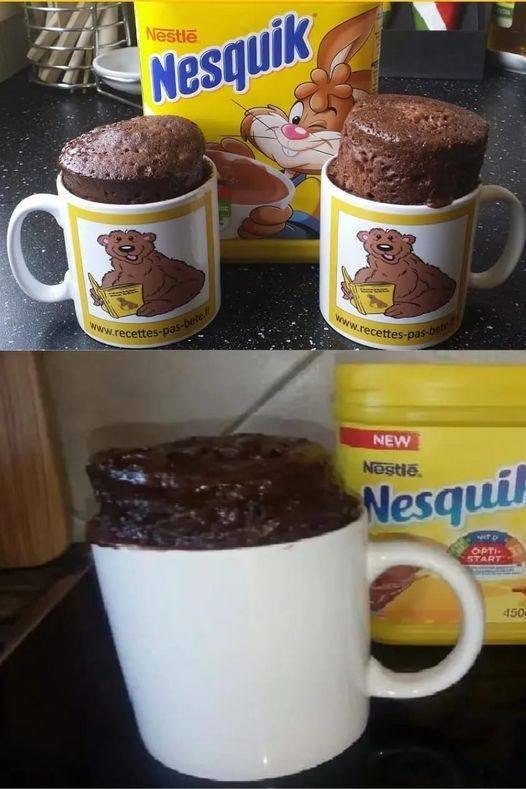
The Nesquik Mug Cake: Chocolate Cake in 5 Minutes, in a Mug
If you’re craving chocolate cake but don’t want to spend hours baking or dealing with complicated recipes, The Nesquik Mug Cake is your go-to solution! This easy, quick, and delicious dessert takes just 5 minutes to make and is baked right in your microwave. Whether you’re cooking for one, or just need a little indulgence without the mess, this simple chocolate mug cake is the perfect treat.
Made with Nesquik, a favorite chocolate drink mix that’s already sweetened and perfectly flavored, this mug cake recipe is the ultimate shortcut to satisfying your chocolate cravings. It’s moist, rich, and comes together effortlessly with just a handful of ingredients you likely already have in your kitchen.
Ready for a sweet chocolate experience without the hassle? Let’s walk through how to make The Nesquik Mug Cake that’s sure to become your new favorite go-to dessert!
Why You’ll Love The Nesquik Mug Cake
- Quick & Easy: Ready in just 5 minutes, this mug cake is perfect when you want a fast and satisfying treat.
- Minimal Cleanup: You only need a mug and a spoon—no bowls or mixers required. That means less cleanup for you!
- Rich, Chocolatey Flavor: Thanks to Nesquik chocolate drink mix, the cake is bursting with that classic, smooth chocolate flavor we all know and love.
- Customizable: You can easily add toppings or mix-ins like chocolate chips, whipped cream, or even a scoop of ice cream for an extra indulgent dessert.
- Single Serving: No need to bake an entire cake—this recipe makes a single serving of warm, gooey chocolate cake, perfect for one person or a quick dessert for a small group.
Ingredients for The Nesquik Mug Cake
To make this quick chocolate cake, you only need a handful of simple ingredients:
- 4 tablespoons all-purpose flour
- 4 tablespoons Nesquik chocolate drink mix (this is what gives the cake its rich chocolate flavor)
- 3 tablespoons granulated sugar
- 1/8 teaspoon baking powder
- Pinch of salt
- 3 tablespoons milk (any kind of milk will work: whole, almond, oat, etc.)
- 2 tablespoons vegetable oil (or melted butter, if you prefer)
- 1/4 teaspoon vanilla extract (optional, for extra flavor)
Optional Toppings:
- Whipped cream
- Ice cream
- Chocolate chips
- Chopped nuts
- Marshmallows
How to Make The Nesquik Mug Cake
1. Mix Dry Ingredients in the Mug
Start by adding the flour, Nesquik chocolate drink mix, sugar, baking powder, and salt into your microwave-safe mug. Use a spoon or fork to mix everything together. This is an important step to ensure the Nesquik and other dry ingredients are evenly distributed.
2. Add Wet Ingredients
Next, add the milk, vegetable oil, and vanilla extract (if using) into the mug with the dry ingredients. Stir well until you have a smooth batter with no lumps. Be sure to scrape the sides and bottom of the mug to make sure all the flour and Nesquik are fully mixed in.
3. Microwave the Mug Cake
Once your batter is ready, place the mug in the microwave. Microwave on high for 1 minute and 30 seconds to 2 minutes, depending on your microwave’s wattage. Start checking at 1 minute and 30 seconds. The cake should rise and set around the edges, but still be slightly soft in the center.
Don’t overcook the cake, as it can become dry. If you want it extra gooey, remove it at 1 minute and 30 seconds for a more molten-like center. For a firmer cake, let it cook for a full 2 minutes.
4. Let it Cool (for a Minute) and Serve
Once the cake is done, carefully remove the mug from the microwave (it will be hot!). Let the cake cool for just a minute or two, as it will continue to cook slightly from the residual heat.
You can serve it directly from the mug or carefully slide the cake out and plate it. If desired, top it with a dollop of whipped cream, a scoop of vanilla ice cream, a handful of chocolate chips, or a drizzle of caramel sauce for
For Complete Cooking STEPS Please Head On Over To Next Page Or Open button (>) and don’t forget to SHARE with your Facebook friends
ADVERTISEMENT
